After many questions relating to action screw torque settings I have compiled the following, these values are what I consider to be safe. To attain optimal action screw torque more work is required.
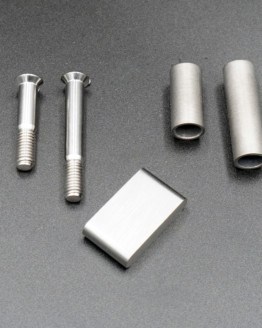
It’s a good idea to inspect the underside of your action screws for excessive burring and gouging due to the interface to the factory trigger guard, replacement maybe required. Excessive burring can cause inconsistent torque application and ultimately effect the accuracy of your rifle. To illuminate this issue please consider using our Improved Titanium action screws.
● Synthetic, laminate & timber stocked Tikka T1x, T3/T3x Rifles in standard form: 30-35 inch-lbs
● Synthetic, laminate & timber stocked Tikka T1x, T3/T3x Rifles with pillars: 30-45 inch-lbs
● Synthetic, laminate & timber stocked Tikka T1x, T3/T3x Rifles with pillars & aftermarket trigger guard: 30-55 inch-lbs
● Aluminium chassis Rifles: 30-60 inch-lbs
Note; these are “wet torques” i.e. Grease or Loctite lubricant is applied to threads.
Excessive torques can cause damage to your stocks and plastic trigger guards, extra care needs to be taken with rifles without pillars fitted.
Finding the optimum torque Value
Every Rifle and load combination will have a sweet spot when it comes action screw torques, by changing the torques you are effectively altering the harmonics of the rifle. Rifles with proper stress free bedding are far less sensitive to this, but can still benefit from some tuning at the range.
Finding the optimum torque is a process of trial and error and can take time, it is important to keep everything as consistent as possible during the process otherwise you could end up chasing your tail.
During this method don’t exceed max torque values as damage can occur.
Method;
- Shoot a test grouping with your rifle with both action screws set to lowest torque value listed above. If you are happy with accuracy at this point no need to proceed further, but if you are like me and enjoy getting the most out of your gear continue.
- Incrementally step your torques up 5 in lbs at a time shooting groups as you go until you either reach your max torque values or until you have observed your groupings tighten and open up again.
- Now it’s time to work on the front and rear screws individually, in my experience Tikka almost always shoot better with more torque applied to the front action screw. If you have already reached your torque limits back off your rear screw and re-torque to a lower value 5-15in lbs less depending your max torque values. If you have identified a sweet spot reset your front action screw back to that corresponding value and rear screw 5-15 in lbs less. Again incrementally adjust the torque on the rear action screw and shoot groups and observe your results hopefully you will have identified a torque combination that offers an improvement over your results from step 2. If not you might be stuck the torque values found during step 2. In some occasions lowering the torque value of your front action can yield better results at this point it really just comes down to what lengths you are willing to go to and the level of accuracy required time may well be better spent on load development.
Good Luck I hope this helps you!!
-
 Tikka T1x Lockdown Bedding Kit$100.00
 -
 Tikka T1X Action Screws Titanium$45.00
 -
 Tikka T3 Bottom Metal$185.00
 -
 Tikka T1x Bottom Metal.$165.00
 -
 Tikka Recoil Lug$35.00
 -
Tikka T3/T3X Lockdown Bedding Kit$100.00
-
 Tikka Action Screws Titanium$45.00
 -
 Tikka Bedding Pillars$40.00